- Published on
Install HACS on Home Assistant Docker Using Portainer
- Authors

- Name
- Simply Smart House
- Portainer Installation
- Setting Up HACS in Home Assistant
- Alternative Installation Methods
- Using HACS
- Conclusion
🎥 Follow along with the video tutorial below:
What is HACS?
HACS (Home Assistant Community Store) is an add-on for Home Assistant that offers a user-friendly interface for discovering and installing custom elements. Think of it as an app store for Home Assistant, but created by the community. With HACS, you can easily browse and install:
- Custom dashboards and cards
- Custom integrations for devices not yet supported by core Home Assistant
- Themes to personalize your Home Assistant interface
- Automations and scripts shared by the community
Why Use Portainer?
Portainer provides a user-friendly web interface for Docker management. This method is ideal if you:
- Prefer GUI over command line
- Use Synology/QNAP and want more reliability than native tools
- Need easier container management and monitoring
- Want visual feedback during the installation process
- Are new to Docker and find command line intimidating
Prerequisites
- Home Assistant running in Docker
- Portainer installed and accessible via web browser
- A GitHub account (required for HACS authentication)
Portainer Installation
Step 1: Access Portainer
Open your Portainer interface and go to the Containers section from the left sidebar.
Step 2: Access the Console
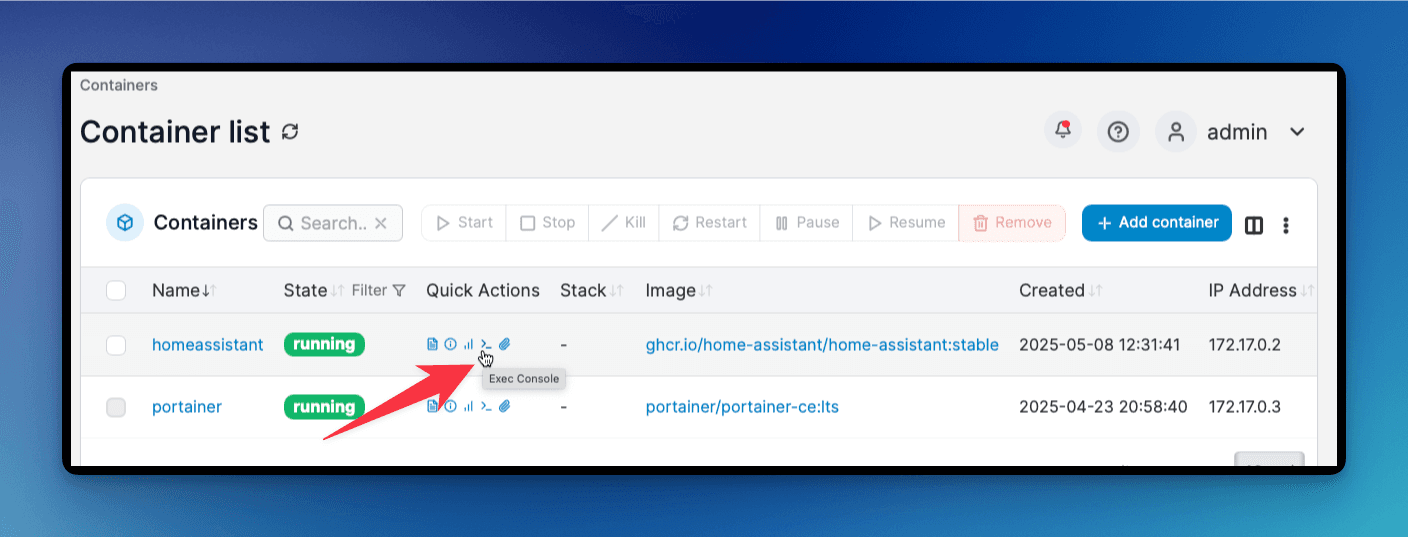
Find your Home Assistant container in the list and click on the "Exec Console" button (>_).
Step 3: Connect to the Terminal
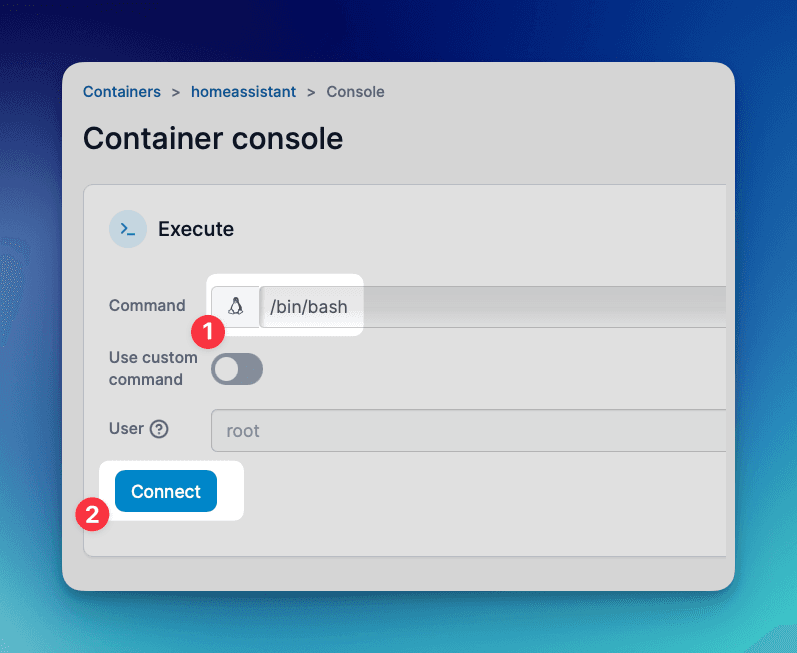
Ensure /bin/bash is selected in the Command field, then click "Connect" to open a terminal session inside your container.
Step 4: Install HACS
Run the installation command:
wget -O - https://get.hacs.xyz | bash -
Step 5: Exit and Restart
After installation completes:
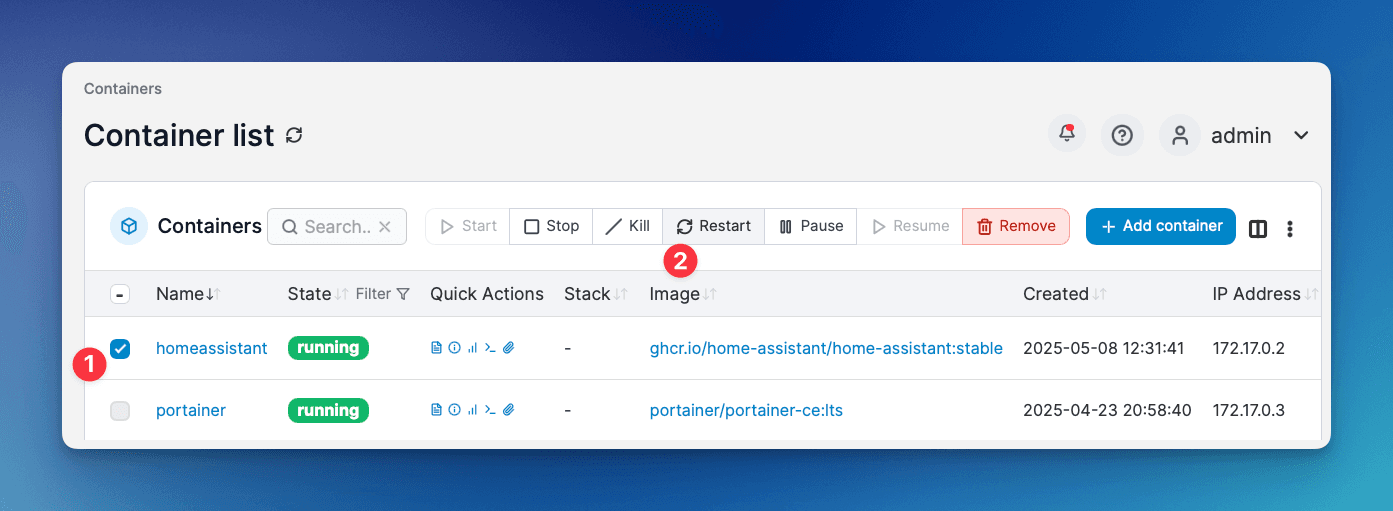
- Exit the console
- Return to the Containers view
- Select your Home Assistant container
- Click the "Restart" button
Setting Up HACS in Home Assistant
After installation and restart, you'll need to configure HACS within Home Assistant:
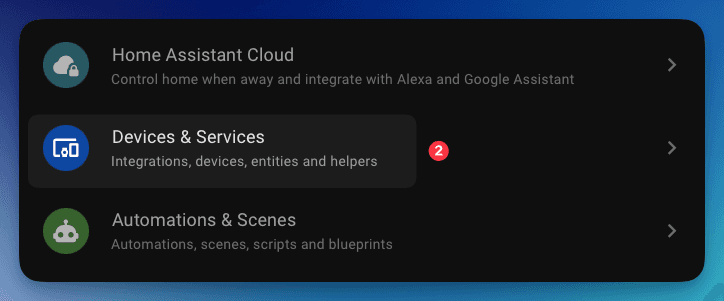
Step 1: Open Integrations
- Open your Home Assistant dashboard
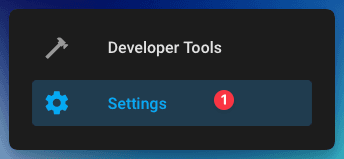
- Go to Settings → Devices & Services
Step 2: Add HACS Integration
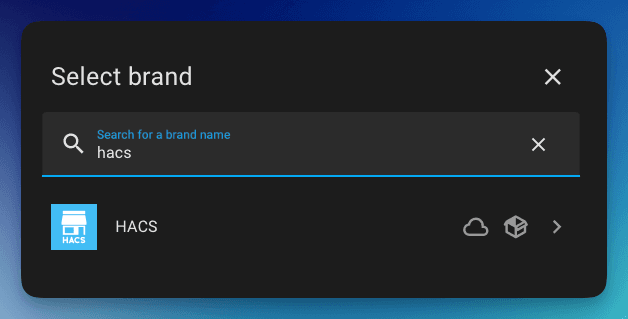
- Click the Add Integration button in the bottom right corner
- Search for "HACS" and select it
Step 3: Accept Terms and Conditions
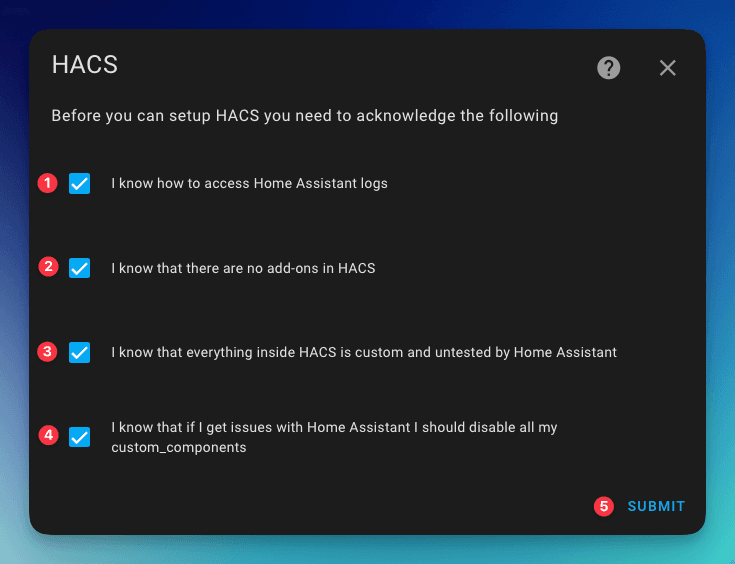
Review and accept the HACS terms and conditions by checking all boxes, then click Submit.
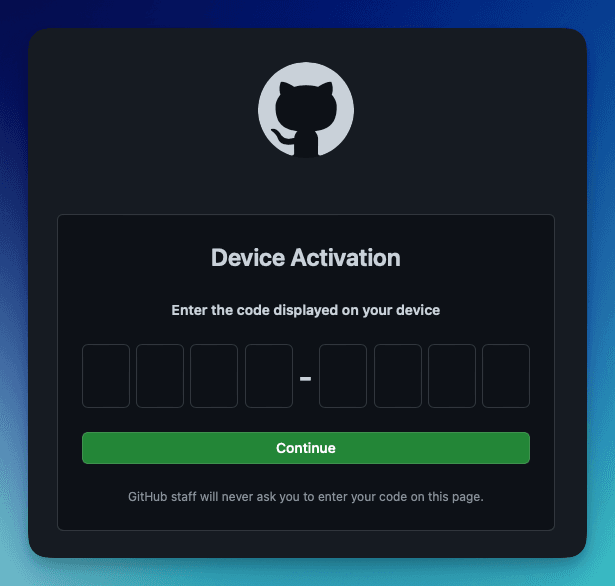
Step 4: GitHub Authentication
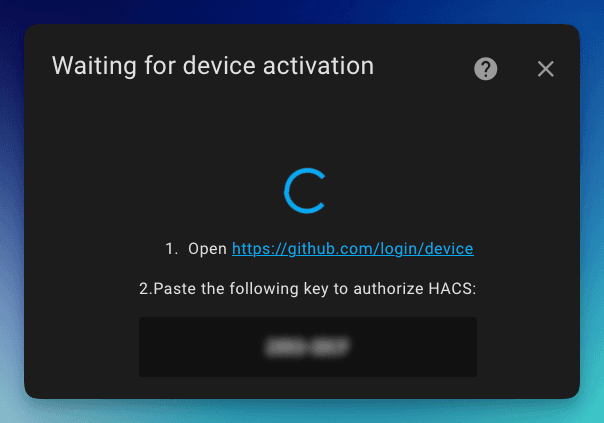
- Copy the device code shown on screen
- Click the link to open GitHub authorization
- Log in to your GitHub account if needed
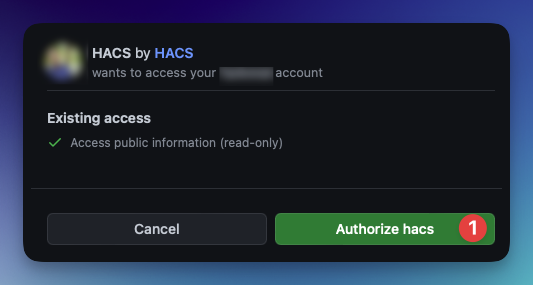
Step 5: Authorize HACS
- Paste the code you copied into the GitHub device activation page
- Click Authorize HACS
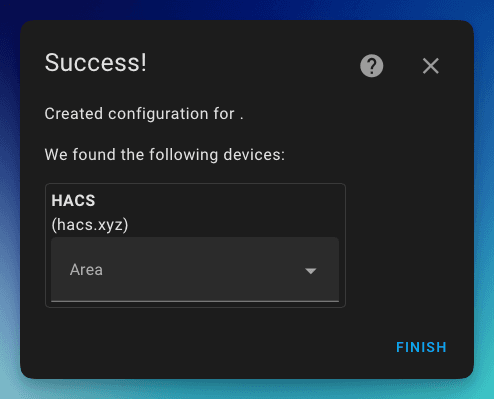
Step 6: Complete Setup
- Choose an area for the HACS integration (optional)
- Click Finish
Step 7: Access HACS
After installation, you should see the HACS icon in your sidebar.
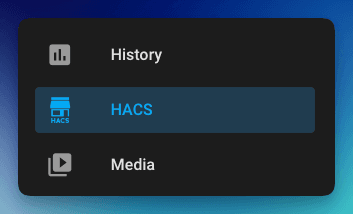
Can't see the HACS icon? Perform a hard refresh of your browser:
- Windows/Linux:
CTRL+F5 - Mac:
CMD+SHIFT+R
Alternative Installation Methods
If Portainer doesn't work for your setup or you need platform-specific guidance:
- Terminal Installation - Universal command-line method for all systems
- Synology Installation - Specifically for Synology NAS users with Container Manager
- QNAP Installation - For QNAP NAS users
Using HACS
Now that you've installed HACS, you can browse for:
- Integrations: Add support for devices and services not included in core Home Assistant
- Frontend: Add custom cards and elements to enhance your dashboards
- Themes: Change the appearance of your Home Assistant interface
Each element in HACS comes with its own documentation for configuration and use.
Conclusion
You've now successfully installed HACS on your Docker-based Home Assistant using Portainer! This GUI-based approach makes Docker management more accessible while maintaining the same reliability as command-line methods.
With HACS, you can expand Home Assistant's capabilities with community-created integrations, dashboards, and themes. The visual interface of Portainer also makes it easier to manage your containers and troubleshoot any future issues.
Explore the available components and enjoy customizing your smart home experience.
If you encounter any issues or have questions, feel free to leave a comment below!


